How to Add a Signature in Gmail (Guide)
A personalized signature not only provides your contacts more impressive, but it also helps your contacts know where to get to you, and where they can get more information about your business. Since Gmail is the most popular web client, it is helpful to know how to adjust its settings. Here’s guide how to add a Gmail signature, whether you’re using a computer, iPhone, or Android device.
Contents
Add a Signature in Gmail
Creating a custom signature in Gmail is simple. Just click on the gear icon, go to settings, then scroll down to the signature panel. Put your signature in the text box. Once done, click “Save Changes”.
Detailed steps Add a Signature in Gmail are listed below:
To set up a signature automatically added to emails you compose in Gmail:
- Click the Settings gear in your Gmail toolbar.
- Select Settings from the menu.
- Go to General.
- Make sure the desired account is selected under Signature.
- Type the desired signature in the text field.
- Click Save Changes.
- Gmail will now insert the signature automatically when you compose a message.
- You can edit or remove it before clicking Send.
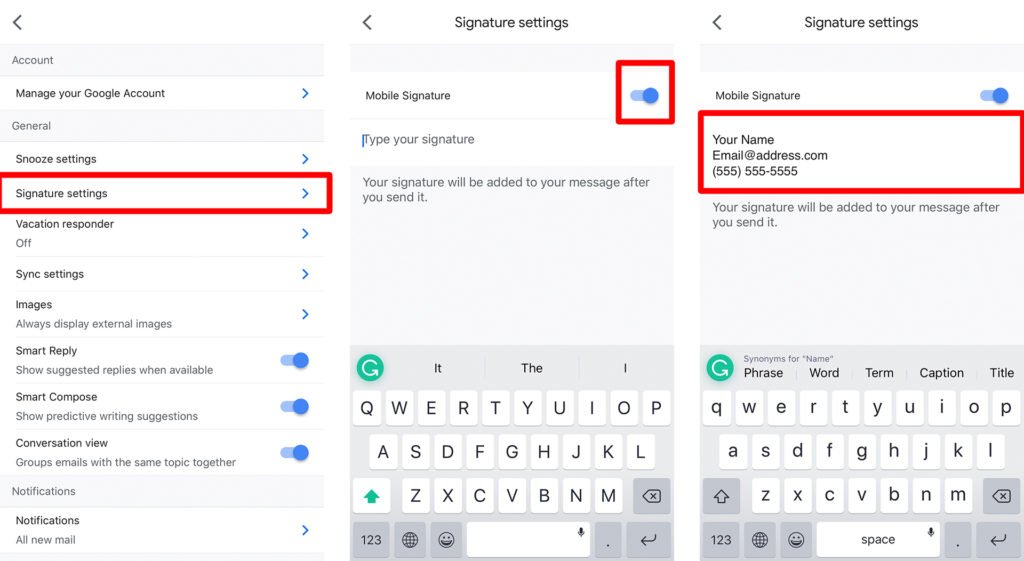
How to Add a Signature to Gmail on an iPhone
The signature you created on the desktop computer will not be included in the emails you send from your iPhone. You will need to create a separate mobile email signature. From your iOS device.
- Open the Gmail app.
- Tap on the three-line Menu button.
- Scroll down and tap Settings.
- Select an email account.
- Then tap Signature settings.
- Turn on the slider for Mobile Signature.
- Add your signature in the box below. Then your new signature will appear the next time you compose an email.
- You can edit or remove it before clicking Send.
How to Set a Gmail Signature on Android
Adding a signature on an Android device is very similar to adding a signature on an iOS device. You can find Full detailed instructions How to Set a Gmail Signature on Android below.
Set a Gmail Signature on Android:
- Open the Gmail app.
- Tap on the three-line Menu button.
- Scroll down to Settings. This will be the second to the last option.
- Select an email address. If you have multiple Gmail accounts, choose the account you would like to set up the signature for.
- Scroll down and select Mobile Signature.
- Type your signature in the pop-up box.
- You can edit or remove it before clicking Send.
- Hit OK.
You will be redirect to the previous screen, where you will be able to see your signature section. Your new signature will now appear the next time you compose an email.
Note: The signatures of Gmail text only and does not give you the option to format text or insert hyperlinks or images.
Now that you know how to add a Gmail signature on an iPhone and set a Gmail signature on an Android device
For more information and latest updates stay tuned with THEGAMEROOF.